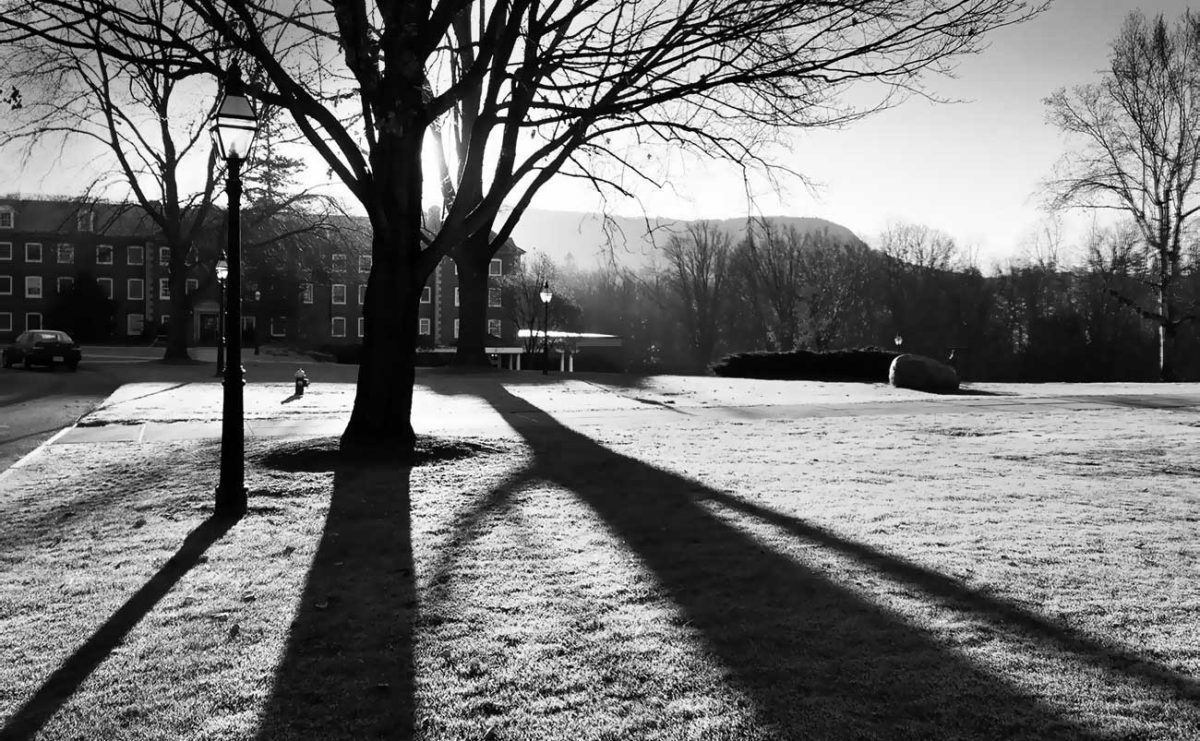
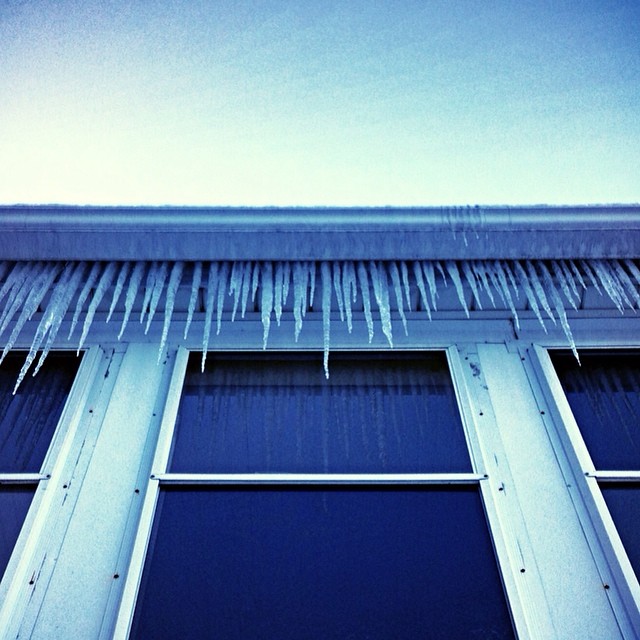
Here’s a photo I posted on a social network:
Lots of friends “liked” it and a few commented. One comment in particular stuck in my mind:
How do you capture light as you do? No, don’t answer. I’m content believing you have some magic.
The magic, if there be any, consists in the miracle of consciousness and attentiveness. I approach a composition as a little meditation, full of gratitude and reverence for the moment, and I am rarely let down. I love that other people enjoy my work and think I have a special talent, but I believe that making beautiful pictures and movies is a learnable skill. Anyone with the will—and access to a few essentials—can cultivate a style all their own and a powerful body of work. In this spirit, I share some of the techniques and approaches that work for me.
Choose your subject matter

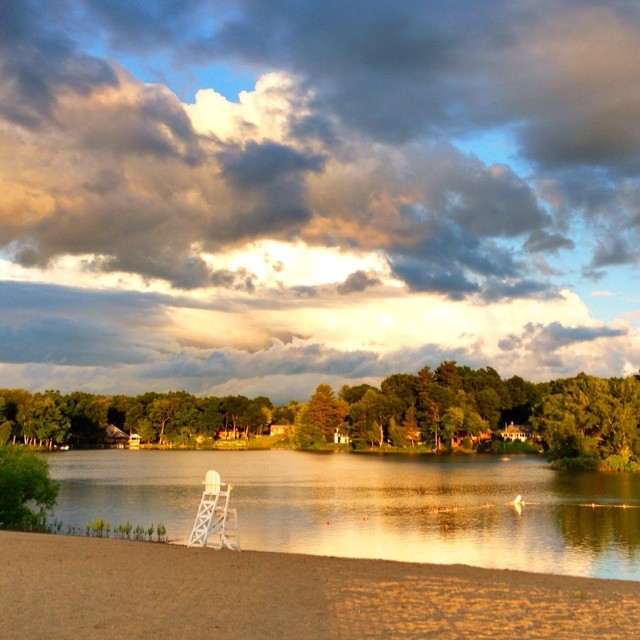
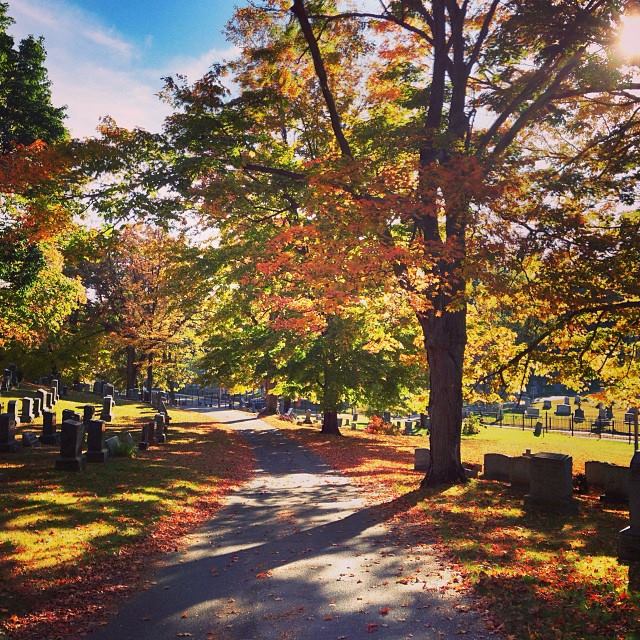
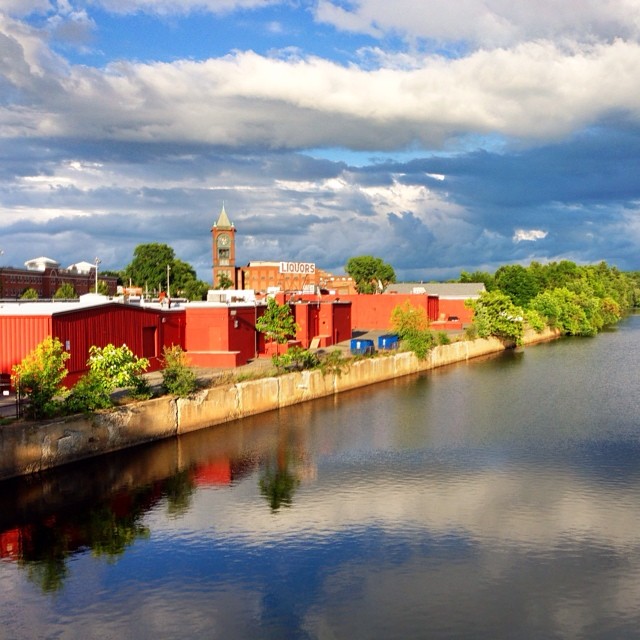
The subject matter I’m most interested in is the light. Indeed, it is the fundamental ingredient in photography. I like the way sunlight plays on natural environments, and in some cases the human-made structures that occupy them. I especially love the quality of light and shadow that the sun makes in the early morning and late afternoon. I rarely use a flash. I love dramatic clouds.
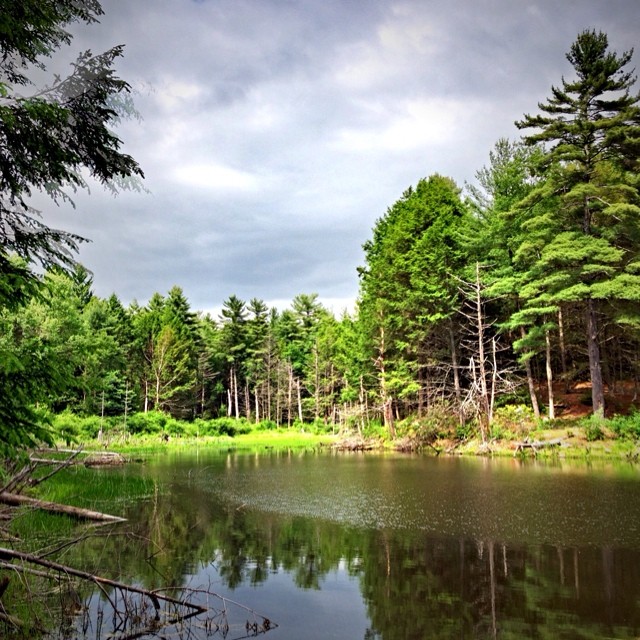
I live in a bucolic area, so I have access to a lot of natural beauty. You may live in a city or a desert or somewhere else, and that is fine. The sun doesn’t discriminate. Figure out a subject that resonates with you, and continue to photograph it at different times, in different seasons, and from different angles. Back in art school I heard this referred to as “thematic development.” Eventually your oeuvre will emerge.
I don’t often publish photos of people. Partly this is out of respect—I don’t particularly like for people to publish photos of me unless I’ve approved them. I do take a lot of portraits for my private collection. Mostly, it’s that I’m more interested in studying and photographing landscapes, which predated humans, and will probably outlive us.
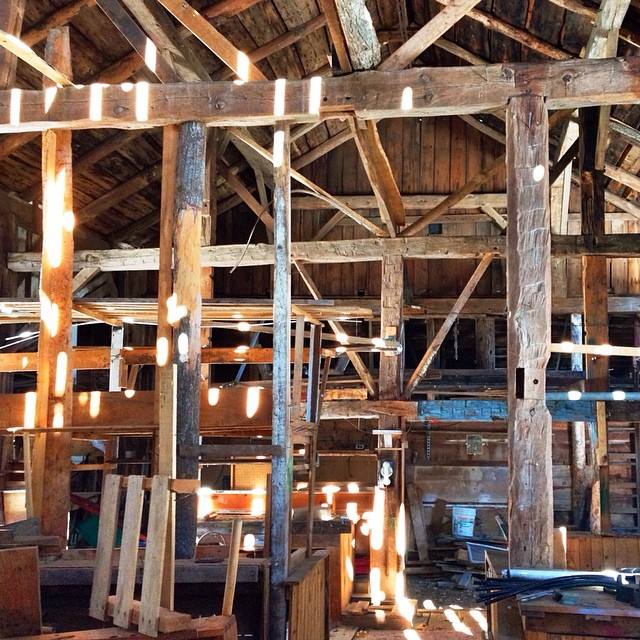
If your situation is such that getting out into the wild isn’t practical, you could make an interesting series of photos of nothing but things lying around your basement or kitchen, or of origami sculptures you’ve made. Or clouds. Play around, and be creative.
Scout a good location
Once again, this relates to attentiveness. In the course of my daily travels I encounter dozens of spots that I look forward to photographing. Sometimes I’ll leave early or stay late, and allow myself a little extra time to explore. Other times, I’ll make a mental note to return to a particular spot at a different time. Obviously, if you’re scouting a particular scene and you see a double rainbow, a thick bank of fog, a moose, or a tree about to fall, drop whatever you are doing and take that picture now.
Oftentimes I see a scene and mull it over in my mind a while before I actually get out on foot (or bicycle) to capture it. How is the subject situated? Cows on a hillside might make a nice picture, but will they be back-lit later in the afternoon (i.e., with golden highlights across their backs)? If so, that might make for a better composition, so I’ll plan to come back later, or on another day. Similarly, a perfect mountain photo might be made even more perfect if taken on a day when the sky is filled with clouds.
Study interesting compositions
Photography can be a lot like juggling. There are so many things to think about and keep in balance in a single moment. It’s a little overwhelming at first. But keep practicing and it will become second nature. Think about exposure (the overall amount of light in a scene), contrast (the relationship between the light and the dark), saturation (the intensity of color), focus, texture, conceptual juxtaposition (e.g., natural vs. human-made), and compositional balance. This last one is subjective, but there are some rules of thumb that can help.
One such rule is the so-called “Rule of thirds.” It’s one of those esoteric principles like the Fibonacci sequence (on which the golden rectangle is patterned) that occurs in nature, and resonates with us on a subconscious level. The idea is that you divide your picture plane (whether it be a rectangle or a square) into imaginary vertical and horizontal thirds. The four resulting points where the dividing lines intersect are where the most compositional excitement occurs. It’s a rule that can be broken, of course, but it does provide an anchor for locking in on a great composition. Sometimes I will move forward or backwards until some combination of elements in the viewfinder align with these points and lines.
If a composition has a horizon line, I usually try to keep it as horizontal as possible. If the angle is off by a little, an app might help to fix the photo after it’s taken.
Know your equipment
Most of the time I use an iPhone, and a combination of a few apps. Lately I have been using Darkroom, which has both an iPhone and a Mac app, and can do “round-trip” editing of photos right in my iCloud photo library.
I have a “real” camera (an Olympus OM-D E-M5 Mark II—crazy naming scheme) that I use for portraits, or when I want to control depth of field, experiment with different lenses, zoom in on subjects, or make a long night-time exposure. But the advantages of the iPhone camera are obvious: I can take a picture, do a little editing, and post it on the web without going through the rigamarole of getting to a computer, connecting cables, managing files, etc. The computer workflow is great for a certain kind of work, but it’s not my main workflow for everyday posting. The adage “the best camera is the one you have with you” is so true. Fortunately, the iPhone camera is a pretty good camera to “happen to have with me” most of the time.
If you don’t have a great camera, fear not. A lot can be done with whatever you’ve got. Even a homemade pinhole camera can make some amazing photos.
Edit
This might sound strange, but I usually take anywhere from three to around a dozen shots for every one that I publish. I like to try different angles and exposures until one seems “just right.” Needless to say, I turn off the feature in apps like Dropbox and Flickr that offer to upload all of the photos I take.
2025 update: I no longer use ANY of the apps I reference below, but I will leave the paragraphs as they are, for posterity. These days (again, 2025) I like to use Darkroom, which has both iOS and macOS apps, and can round-trip edit directly from/to my Apple Photos library. In Darkroom, if I create a set of edits that I want to reuse, I can save it as my own preset, which will sync to all my devices that are logged in and running Darkroom.
My secret weapon is the Pro HDR X app. It takes two exposures in succession—one metered on the highlights and the other on the shadows—and overlays them. The catch is that to use this app successfully you have to stand shock-still for a second while the app takes the two exposures. With this app, I have no qualms about taking pictures looking directly into the sun.
I also like to use the Aviary app for general post-processing, like cropping, straightening the horizon, sharpening, blurring, color-balancing, etc.
I initially capture images in full color, but sometimes a composition will benefit from being converted to black and white. My favorite tool for doing this is the Vint B&W app. Of all the apps I’ve tried, this one offers the best tonal sensitivity. Its photos most closely approximate the look of real black and white film photos taken through an amber or red glass filter.
I’m not a big fan of using retro “filters” on most of my shots, but I make exceptions on a case-by-case basis. Often the Pro HDR app will deliver exactly the look I want, right out of that app. If you happen to use a less-capable camera, then a filter might enhance your shots. Follow your gut.
Publish the work
2025 Update: right now I am giving Instagram and Facebook a rest, and am publishing more here on my own site, and occasionally on Bluesky. But I will leave the paragraphs below as they were when I originally wrote this post, for posterity:
Right now I like Instagram. At first I had mixed feelings about being limited to the square format, but I’ve grown to like it. The square is a great canvas in its own right, but it works particularly well on today’s mobile web, where you’re never sure how people will be viewing your photos (phone, tablet, or computer).
Often I mirror my Instagram pictures to Facebook, where they receive more feedback than they do on Instagram itself. Sure, Facebook can sometimes be a sea of unedited thought, sensationalism, commercialism, and privacy violation. But it’s possible for the cream to rise to the top and become a signal among the noise. A thoughtfully illustrated post by a real person with purity of intention will easily hold its own against a typical click-bait article. If I manage to add a bright spot to someone’s day with one of my pictures, then I will have succeeded. For some reason I’m not compelled to post every day or even every week. There needs to be some digestion time—I just post whenever it feels right.
Flickr is another service I use, but only half-heartedly these days. Back when I first joined (2007) the interface was a lot more functional and less cumbersome. But as of this writing, both the iPhone app and the desktop website feel a little heavy-handed in their emphasis of the slick user interface at the expense of easy access to the photos and community features.
But Instagram has a flow that feels light, simple, and unfettered, so that platform is where I’m publishing most of my photos now.
(2020 Update: Instagram is now a cluster. Too many ads and silly features to be considered a serious platform for art.)
Video is another matter. All the aforementioned services—Instagram, Facebook, and Flickr—compress and degrade video quality to an extreme degree (if I can even get video to load on Flickr). Vimeo, on the other hand, does web video right. (2020 update: Vimeo has kind of ruined their service with feature-itis.) YouTube offers pretty good encoding quality, but there is little control over what shows up after your video plays. I’ll write more about video in the future.
I could of course post all of my photos here on my own website. But it wouldn’t be as much fun without the social features and the attentive audiences offered by one of the social networks.
Above all, enjoy the process of taking pictures and sharing them. Thanks for reading.